




I've received requests to post a demonstration of this technique. I had hopes of doing a video demo but the image quality of the test videos I ran with my current camera weren't the greatest so I've done a photo demo instead.
1.) I suggest you cut your waxed paper no more than 1"- 1 1/2" larger than your backing paper. The backing paper is the substrate you'll be gluing your finished batik onto.
2.) Crumple the waxed paper into a ball, smooth it out, then crumple once more. You want the little creases evenly distributed across your paper. Try to avoid long, straight creases.
3.) Image no. 3 shows the amount of crumpling I prefer.
4.) Ready for the India Ink. I use black India ink(full strength) and an old, stiff bristle brush to spread the ink. I suggest working on two layers of waxed paper underneath your painting to protect your work surface as the alcohol ink will bleed through. One tip: Slip a piece of white paper cut the size of your finished painting underneath both layers of protective waxed paper so you have a size guideline.
5.) The India ink has been spread out and at this point I wait a few minutes to allow the ink to settle into the creases before wiping away the excess with plain water and paper towels. As you can probably see, I also use my fingers to work the black ink into the creases.
6./7./7.1) A few views of the waxed paper after the excess ink has been wiped away. In view #7 you can see I slid a piece of 5" x 7" paper underneath so I know where the borders of my finished painting will be.
8.) If you choose a drawing to use for the painting it can also be placed underneath the waxed paper so it's visible. I used a black Micron .o8 pen to go over all my lines so they were easier to see.
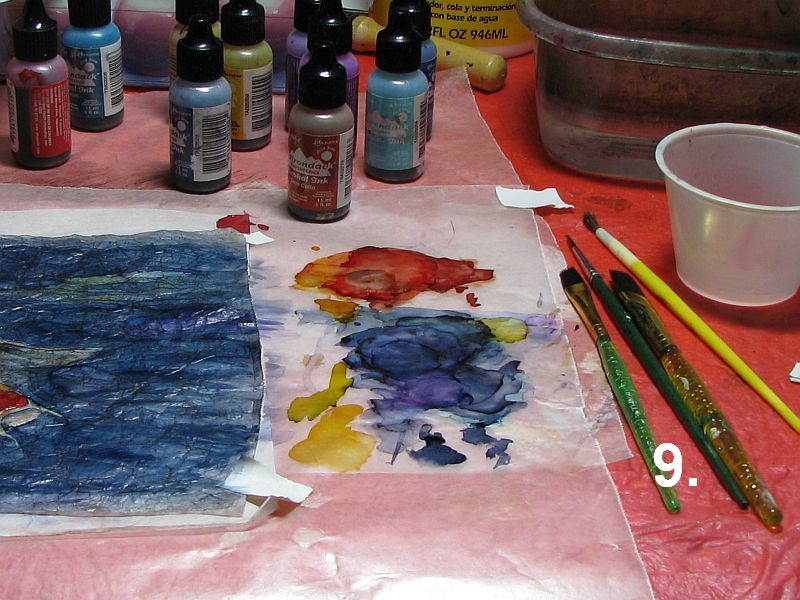
9.) Once I'm ready to paint, I place a small bowl of rubbing alcohol and another of clean water nearby to wash my brushes after each use. Also for cleaning brushes when switching colors. I mix my own colors by dropping the alcohol inks onto the protective waxed paper and picking the ink up with my brush. Use inexpensive brushes for these paintings as alcohol ink isn't very healthy for your good sables, etc.
10.) My painting is now finished and is ready to be glued to the backing paper.
11.) I apply Mod Podge with an old brush to the backing paper(in this case, a piece of Yupo) in a thin, even coat...
12.) and position my painting over the Yupo, making sure it's placed exactly where I want it. Then I use a soft brayer to press it into the glue, working out any trapped air bubbles. I also check for any places that may need another dab of glue, usually the corners. Lastly, I use a pair of scissors to trim away the excess waxed paper and the painting is complete.
NOTE: The koi fish painting has been sold.

