Translate

Showing posts with label frisket film. Show all posts

Wednesday, March 23, 2016

More Bugs


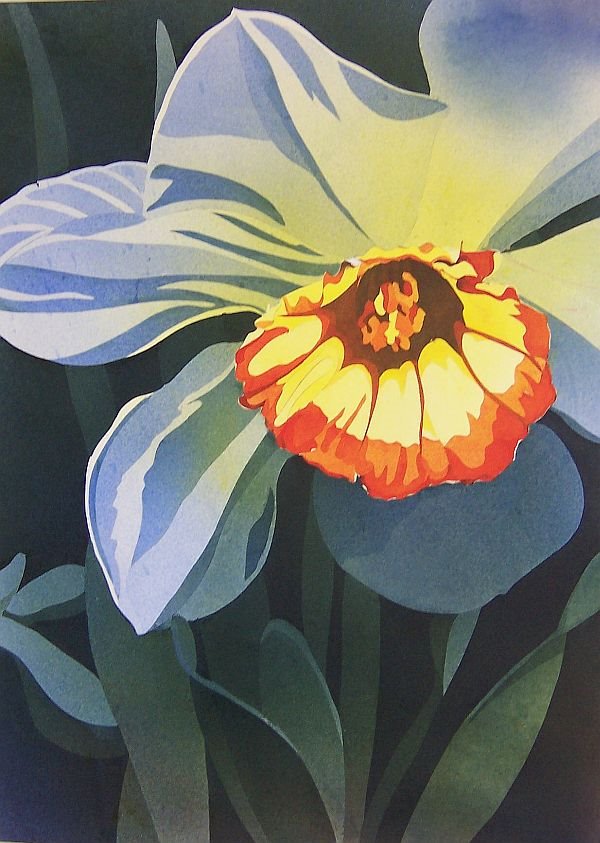
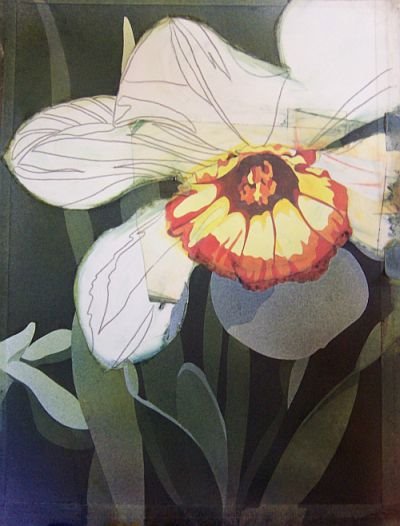
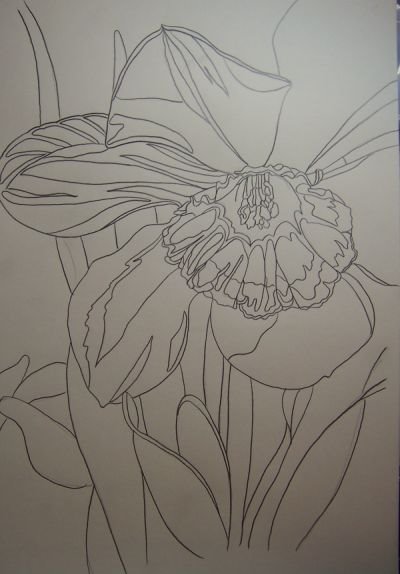
Here's the latest efforts, hot off the easel. I may have to redo the yellow moth. If you look closely I forgot my own advice and cut into the Yupo too far. It's easy to do. I should have another update tomorrow but there may be a very short break while I wait for more frisket film and liquid frisket to arrive from Blick. I was surprised how quickly I ran out!

FYI, if you want perfection don't work with these inks, at least not in this manner. There will invariably be imperfections here and there. As Vivi at the gallery says, "it's the hand of the artist". Much like watercolor, these inks work best if left to go their own way to some extent.

Monday, March 21, 2016

Bug Me ~ a new series


Spring is coming and it looks like Mamas' got her ink on again. I finally have a new direction and it's about time, too. 2015 kicked my behind health-wise and I'm still dealing with the aftermath. It's difficult for me to sit for any length of time at my work area because of severe arthritis in my spine and I wound up losing all my forward momentum. This past week I told myself I will paint two bugs every day no matter how I feel and so far I'm doing it. And it feels good. I just love bugs and I love alcohol ink so this series makes perfect sense to me.

I'm using the frisket film still which allows me to pour the inks to my bugs with abandon. Occasionally I use a little liquid masque as well. I'm only limited by my imagination. In addition to the alcohol ink I've been embellishing a few of my bugs with Brilliance Archival pearlescent inks .  
Jo Ann's was having a sale on these ink pads and I couldn't resist.

All the paintings are small (5" x 7") and are surprisingly labor intensive. If anyone wishes to give this a go let me give you some tips.

  1. Make sure your working Yupo is completely covered by the frisket film. Otherwise the inks have a way of sneaking underneath and winding up in areas they shouldn't.
  2. When applying the film be sure to leave no creases or bubbles, again for the reason listed above.
  3. Be sure to keep a sharp blade in your Exacto knife for clean cuts. The moment the blade starts to drag change it.
  4. When cutting out the shapes fight the urge to bare down too hard on the blade. You don't want to cut through the Yupo. A light hand on the handle of the knife helps.
  5. You can draw on matte frisket film to give yourself guide lines if you wish. 
  6. After you've made your cuts hold the Yupo up to the light so you can see your cut lines. I miss spots all the time so I recommend double checking. Also double check after you've removed the Yupo from your cut shapes and before you start inking. Frisket film tears easily and some little pieces might get left behind.  
  7. Work as clean as possible. Nothing is more heartbreaking than a big ink smudge on a new ink painting. This is one of the biggest challenges for me.
  8. Happy inking!

Monday, February 15, 2016

Alcohol Ink & Frisket Film


Here I've used frisket film on Yupo and cut out simple shapes with an Exacto knife before applying my ink. For those not familiar with frisket film, it's a lot like transparent contact paper with a low tack adhesive. Most art suppliers carry it.

I've wanted to try this for some time and finally got around to it recently. It's fun to have the edges of the film corral the ink and to feel free to keep throwing color. It's almost impossible to make a mistake with this technique. These are a few of my results. I think they could handle some more embellishment, possibly some jelly roll pen or marker OR I may just leave these as is and give them a coat of gel gloss medium. I don't dare spray Krylon varnish in the house in winter.

frisket film

Wednesday, August 11, 2010

Pat's Sunflowers~WIP continued


I transferred my drawing to Fabriano HP paper, then applied a layer of frisket film over top. I started cutting away areas of frisket and just kept going, basically deconstructing this sunflower. I have no idea if this will be a success or not but I had to try. I mixed up three containers of Da Vinci fluid acrylic...one with a mix of Phthalo blue/Hookers green, one with the same mixture plus Burnt Sienna added and the last with just Burnt Sienna, all diluted with water and I started pouring. I won't be able to update until Friday. My camera batteries died and they take 24 hours to fully recharge. In the meantime, I'll keep pouring and see what comes of it.

Friday, March 09, 2007

Daffodil wip

Here's the finished painting. I may decide to
do a little more tweaking or chalk this one
up to experience.

I've masked off the finished cup and
started working first on the background,
then on the foliage and the lowest petal.
I started with the cup first, then masked it off
before completing the rest.
The sketch. I wound up tweaking this a little as I went along.

I enjoyed Mehaffey's technique so much I thought I'd try it again on another subject. I've used the same reference for this daffodil with graphite and really loved the results. This was much more difficult than the waterlily and I'm not entirely sure I like the results. It's all part of the learning experience, though.