
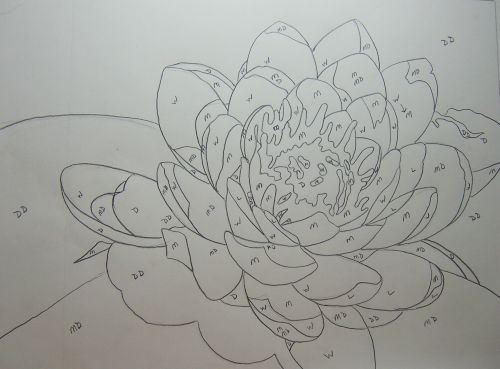
Here's my line drawing. I penciled in my values:
D=dark, M=medium, L=light, etc.
I tried a new painting technique. It's very different from anything I've used before. I purchased a demo on DVD from Creative Catalyst featuring Mark Mehaffey. It's called
Build Design & Color Using A Mouth Atomizer.
He uses a mouth atomizer but I decided to try the little spray bottles that spray a fine mist. The basic idea:
1. Create a simplified drawing of your subject using approximately 5-7 values.
2. Make a line drawing of your subject using at least a 4B pencil.
3. Using mat frisket film lay the film down on your drawing and burnish to release air bubbles and transfer the graphite onto the sticky side of the frisket.
4. Making sure you've taped down your drawing
well, peel the frisket off and lay it over your working paper.
5. Working from the center outwards smooth down the frisket, working out any air bubbles. You now have a clear image to work from but nothing is actually on your working paper. The pencil lines are on the underside of the frisket.
6. Start with the areas that will be the darkest. This is the opposite of how watercolor is usually applied. Using a #11 Exacto knife with sharp blade remove the frisket in the areas you wish to spray. Keep changing blades often! Once you feel it dragging, change it! The frisket is very thin so I made sure not to cut too deep to avoid scoring my paper.
7. Another consideration: after each spraying wipe the remaining frisket with a paper towel (in small areas I used a Q-tip) so the paint doesn't build up and obscure your lines.
8. Keep spraying to build not only values but color. I used the 3 primary colors, one warm and one cool of each. Doing this allowed me to not only change color but temperature.
9. Let the fun begin!

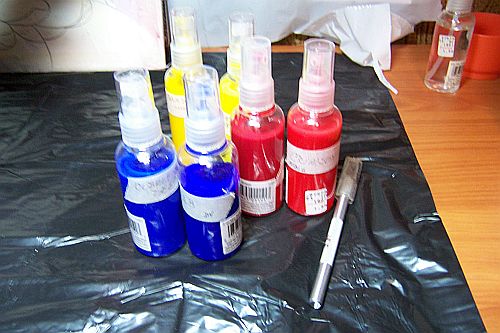 Almost forgot. These are the sprayers I used. They
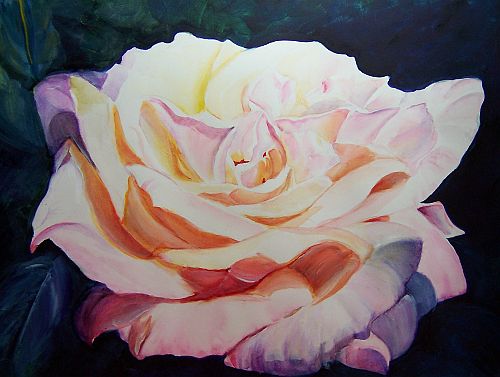
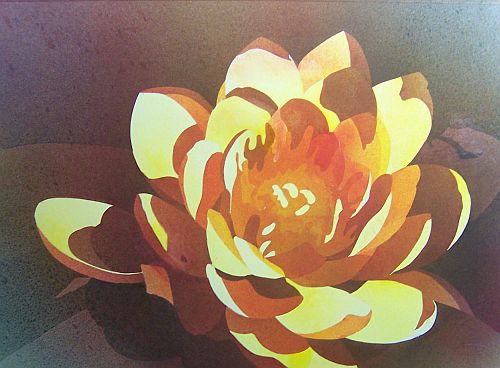 And here is my waterlily completed. There's many
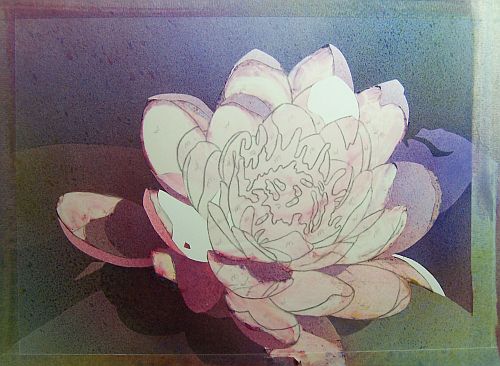 And more layers. It's starting to look like something!
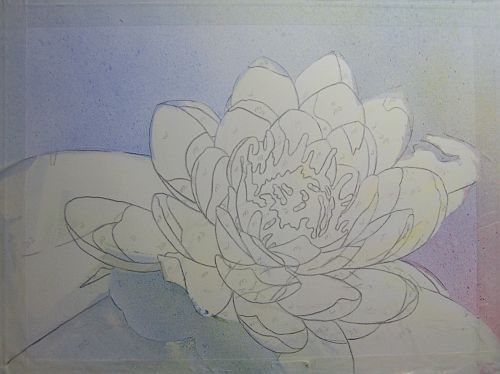 Here's the first few layers of paint. I'm trying to
 I've removed my frisket from the drawing and placed it on