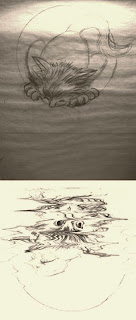


I purchased this program last year after downloading a Free Trial Version online. It worked great for editing and printing my notecards and that's really all I needed at the time. After the trial period ran out, I was sent an email offering a discount on the full program so I bought it. It cost about $75.00 plus tax and shipping at the time. Now, I don't pretend to begin to know what all the features are or how to use them but I have another cat fantasy piece in mind so I thought I'd see what I could do with the Elements editing features. There's a lot of online tutorials available but they tend to make my eyes glaze over reading them so I just started playing around.
Here's a brief and rather sketchy tutorial of my experiences. From the bottom to the top.....
(1. This is the main editing window. It functions much like any other editing program. You retrieve your selected image from 'File'.
(2. This is my first image which I've rotated for editing purposes.
(3. Select 'Auto Select Layer'. Why? I don't know other than you DON'T want to create a locked layer. That will greatly limit your editing options.
(4. I wanted to create a watery, wavey reflection of a cat's face so I chose 'Liquify' from the 'Effects' menu. Be sure to click on 'Apply' at the lower right hand corner to initate. This will take you to another window. You'll see a circle which will take the place of your cursor arrow. That's your brush which you can adjust under the 'Tools Option' at the right of the screen.
(5. I ran my 'brush' back and forth across the image, giving it the look I was after. When the right look was achieved I clicked 'OK' which took me back to the original window. I then saved this altered image in My Pictures.
(6. I used another editing program to put this new altered image and another I had drawn together to see how well I did.
Voila! Well, it's kind of crude but I'm still learning. I hope this helps someone who's as PS challenged as I am.


