Translate

Thursday, December 31, 2009

Happy 2010!

Photobucket
Photobucket

2009 has come and gone and boy, did it go fast! 2010 is here and tonite there's a blue Moon. I've used the phrase," Once in a blue Moon" numerous times but never truly understood where that particular phrase originated or what it actually meant. I had always assumed it meant something that was a rare occurrence and I was mostly correct. A blue Moon is simply a second full Moon occurring in one month. I did a little research and found some interesting facts regarding Blue Moons. Actually I think it's kind of neat that this particular blue Moon is falling on the eve of the new year but I have a friend that works in a casino and she isn't as thrilled. It seems things get a little crazier during full Moons with casino crowds and twice in one month... well, she's not looking forward to work tonite.


Accessing my artwork these past 12 months, I'm pretty excited with what I consider clearing my biggest hurdle which was loosening up more and becoming much more adventurous. I'm looking forward to exploration not only with watercolor but fluid acrylics, collage and I plan to continue experimenting on different surfaces as well. I'm thrilled and grateful that I've gained more followers and have met many wonderful artists through blogging and Facebook. I don't know where I'm headed with my art but not knowing is half the fun...at least for me. Afterall, life is an adventure and art is a big part of my life.

May all my visitors have a wonderful, inspired and productive 2010. Happy New Year!
Photobucket

Thursday, December 24, 2009

Happy Chrismukkahkwanzaayulemadan!

I want to thank all my visitors for stopping by my blog and special thanks to those who took the time to leave feedback & encouragement. It means so much to me.:)

I found this little animation online and thought it had everyone covered and whichever holiday you choose to observe, I hope you all find some peace and joy in the spirit of the season.

Photobucket

Tuesday, December 15, 2009

Crabby Cat Christmas

With some text added


I wasn't planning on printing any Xmas cards this year because I didn't want to spend the money at the printers just before the holidays. Maybe next year...huh? Last night I was fooling around with Elements and decided to try printing out 'Snowflake Flies'. I haven't had much luck with my home printer lately so I never expected the cards to turn out but they actually did!
********
This gave me the impetuous to try another Xmas card idea I had floating around in my head. Pressed for time, I drew out my sketch and outlined it with a micron pen. Then I scanned and enlarged it. Today I printed out the sketch directly onto #140 HP w/c paper and added color with Prismacolor pencils and watercolor. I will probably add some text and will post the image again when it has been added. For the rest of the day I will be printing out the new cards and getting them ready to take to the gallery. I hope it isn't too late. Nothing like cutting it close.

Saturday, December 12, 2009

A Photo Sunset


This is my first attempt at working with watercolor on photo paper...very cheap photo paper. I had a vague plan to paint Fall leaves when I laid down my first brush strokes but the paper had other ideas. I had expected the paint to bead up but instead it took each stroke and showed the trail of every bristle. When I want paint to move and soften I'm in the habit of lightly spritzing it with water from an atomizer but as soon as the mist hit the photo paper it buckled like crazy! There was nothing I could do but wait until it dried. Fortunately, the paper flattened itself out eventually so I looked at it trying to decide what I could work out. Because of the way the paper buckled it created a landscape of sorts, at least to my eye, so I proceeded to follow that up with some tweaking. The above image is my result. I DO plan to try this paper again, a little wiser but knowing full well I will have very little control over the end product. That's kind of exciting actually.

Saturday, December 05, 2009

Yupo Replacement

Check out Myrna Wacknov's latest blogpost. She used photo paper in place of Yupo with some very interesting results. I'm excited about this news because I recently discovered our local $1 store carries photo paper...8 sheets for a buck(!) and I've been wanting to give Yupo a try. I think I know what my next project will be.

Friday, December 04, 2009

Snowflake Flies~Xmas Card

With Text


Without Text


I finally got this card done. I had to enlarge my tiny sketch to 12" x 16"as there was so much detail to tackle. It's times like this I wish I had a projector. Maybe next year.

I may tweak this with some pastel pencils and/or some colored pencils OR I may just leave it alone. I see I missed adding the stripes to that little candy cane peeking out of Santa's sack. Gotta fix that!

Monday, November 23, 2009

Doodling Xmas Card Ideas


For some reason I've never created a Christmas card so I began doodling on some notepad paper and came up with this idea. I thought, "Wouldn't it be funny if Santa had a cat and decided to take said cat with him on his Xmas Eve rounds. And wouldn't it be even funnier if Santa suddenly realized his cat had a fear of flying! What exactly might that trip look like?" :D

Friday, November 20, 2009

Gingko Leaves~Fluid Acrylic on Gessoed Paper

Here's a much better image, taken on a sunnier day. This painting tranforms with each change in light which isn't an entirely bad thing.
SOLD

Here's the completed piece with gold metallic oil paint added. It's actually a terrible photo. The lower righthand corner appears much too dark and dull, the top is too bright and washed out. I had to rely on indoor lighting as we're having a run of cloudy days. If I can get a better photo I will repost.


The second leaf has been added as have a few new colors...mostly Phthalo blue, Green Gold and Burnt Sienna. With each application of paint I allowed it to dry for awhile, then rinsed away the excess revealing some pretty cool textures.

I transferred my gingko leaves onto the first coat of gesso after it dried. I wasn't happy with the texture in the gesso so I added another thin layer over top. Fortunately, my drawing was still visible through the second coat. I traced around the shape of the leaves and added some veining using the tip of an awl, basically indenting and exposing the paper. The plan was to let the paint settle into the indentions but I couldn't get that to happen. I had hoped that the exposed paper beneath would grab the paint but it didn't. It simply rinsed away with each application of acrylic. Maybe I didn't dig down deep enough?


Lately I've been more interested in trying new techniques than in my actual subject matter. Here I've chosen something simple that has a pleasing shape to me(gingko leaves)and finally broken out my Da Vinci fluid acrylics. The good news...they're permanent when dry. :) The bad news...they're permanent when dry. :( Working with acrylics, even fluid acrylics which are similar to watercolor, is a new experience. I felt as though I was in a race with the clock to get the effect I wanted before the paint dried. On the bright side, I didn't have to worry about washing away areas that I liked (if I waited until they dried first) before adding more paint.


I'd like to share my first experiment with the fluid acrylics. It's not a masterpiece by any stretch but gave me a feel for the medium. It also gave me a chance to try adding metallic oil paint to my composition. I've been dying to try this. I added a few flourishes of metallic gold here and there to embellish the painting after the acrylics were completely dry. Between the sheen of the acrylic and the shine of the metallic paint this was a real bugger to photograph but I did the best I could. It might have been smart to spray the painting with matte fixative beforehand but I didn't think of that until just now.

Tuesday, November 10, 2009

Berries & Birch~ Round 2 Completed!

I've included a few closeups to showcase the texture. You should be able to see where I added some white colored pencil to highlight the ridges. Love the icy feel the pencil lends.


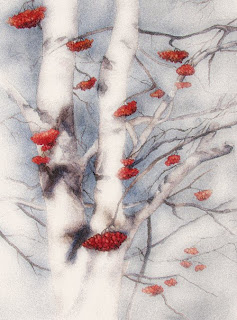
This is the completed painting. I managed to tweak the original image so it looks closer to the real thing.


I've finished the tree trunks and the background and I'm ready to remove the mask so I can paint the berries.


It's done(!)although now that I see it on screen a few places need a little cleanup. I had lots of fun working with the tissue paper/gesso texture. I think I came as close as possible to matching the results I got in Elements using the watercolor filter. I didn't go quite as dark for fear of it looking dreary. For my palette I used Payne's Gray, indanthrene blue, neutral tint and a little burnt sienna on the bark and DS Pyrrol red, perm. yellow and more burnt sienna for the berries. To bring out the texture I used various colored pencils lightly rubbed across the ridges in certain areas which gave me yet another idea.

I've been admiring Sandy Maudlin's watercolor batiks on rice paper and wondered if it might be possible to create a reverse batik technique, if you will, using the tissue paper/gesso texture. Instead of applying ink into cracks in hardened wax, why not highlight the ridges in the gesso with a dark color producing roughly the same effect? I may have to explore this further.

Friday, November 06, 2009

Berries & Birch II~Round 2 WIP

This is the final surface I have to work with, remounted onto my working board. The buckling is mostly gone. The lighting I've used has created shadows that look like the buckling is worse than it is IRL.
I removed the prepared paper from my board, dampened the backside and weighted it down to flatten out the buckles. I was also concerned about tearing when I removed the tape as it had several layers of gesso over it plus the tissue. I took an Exacto knife and ran it along the inside edges of the tape before finally stripping off the tape completely. I'm glad I did that as I may have had problems later down the line.

Closeup of the texture from the crumpled tissue paper. This is before I applied the last coat of gesso. Lots of air trapped underneath at this point.


I've just applied the tissue to the second layer of gesso. You can see the buckling problem.


I finally decided to abandon my first version of Berries & Birch II. Even though there were passages I loved, the majority of the painting wasn't happening for me. Taking my last sheet of Arches HP, I covered it with a layer of acrylic gesso and decided to start again. Then I got the bright idea to add a layer of crumpled tissue paper for added texture. I've learned the hard way that trying to embed tissue paper into a thick wet layer of gesso is a very bad idea (the tissue will disintegrate) so I allowed the first layer to dry completely, then laid down a thinner layer and applied my tissue. When that was dry I trimmed off the excess tissue around the edges and thinned my gesso with a little bit of water and applied yet another thin layer of gesso. I did get some buckling so I removed the entire sheet of paper from the board, dampened the back and used heavy books to weight it down. It took 2 days to dry but removed the worst of the buckling.
_______________
The next step will be to transfer my drawing onto this surface. After that it's anyone's guess(including mine) how things will turn out. Stay tuned.............

Sunday, November 01, 2009

Kreativ Blogger Award


I'm very honored to announce that Krista Hasson has chosen my blog to receive this award. Thank you so much, Krista!
Now for the rules. Yup, these awards always come with rules. I must list seven things about myself my visitors might not know such as:


1.) I tend to be an impatient artist. I lose interest in a project if it takes too long.
2.) I really enjoy experimenting with different styles, surfaces and combining other mediums with watercolor.
3.) I'm a terrible procrastinator. Actually I'm a great procrastinator. I do it very well.
4.) I hate to clean house.}:( Unfortunately I love a clean house! I'd give my eye teeth for a maid.
5.) I tend to be a bit of a hermit.
6.) I loathe winter. Snow is NOT my friend.
7.) I don't think I've ever been as enamored with a medium as I have with watercolor. IMHO, no other medium compares.

Now I must pass this award along to seven other art bloggers whom I admire.


Jeanette Jobson
Angela Shogren
Tracey Costescu
Janet Belich
Stephie Butler
Christine
Dave Boles

Saturday, October 31, 2009

BOOOO!!!!


HAPPY HALLOWEEN TO ALL MY VISITORS!
This is a real oldie...probably about 12 or 13 years old. I call it 'The Long Scream'. Charcoal, black & white soft pastel on Bienfang paper.

Wednesday, October 28, 2009

Berries & Birch 2~Update


Just a quick update on my progress. Not the best photo but the best I could do with the lighting conditions at the moment. I don't recall ever working on a painting that required so much 'coaxing' as this one. I tried to find shortcuts for the background effect I'm trying to achieve but could find none. I've worked the paint with Q-tips and a stiff bristled brush, pushing and blotting, pushing and blotting some more. The gessoed surface has definitely been beneficial for this project as I've had to scrub back areas. Uncoated w/c paper could never have withstood this and I'm not done yet. The branches look too neat, my marks/strokes should be much bolder. The background should be darker to make the birch bark look brighter....yada, yada. Also I still have to add in the berry clusters in the lower right and paint in more twiggy things.

Wednesday, October 21, 2009

Berries & Birch 2~WIP

Much more still to be done on this. I'm liking the graphic quality but am having some issues with the background right now. I'm working on gessoed paper and experimenting with wet charcoal and watersoluble graphite. It's certainly been a learning experience!

Boy, it seems like ages since I last posted on my blog. October has been an unusually busy month for me and there hasn't been much paintin' goin' on 'round here. I've been working on this one for the last 4-5 days and I'm still not sure if it's going to be a hit or a miss. I think it's going to be one of those 'I'll know if I like it when it's completed' paintings. I was inspired by one of the effects I created in Elements using the first version of Berries & Birch.


Note...I've found a new print shop closer to home which is a good thing with winter looming. My home printer just won't print decent notecards anymore so I'm having them printed for me. I'll be doing all the trimming and scoring myself. I'll also be offering the Catitude notecard series in sets which was a suggestion of the gallery and something I've always wanted to do but wasn't sure my printer could deliver the goods.


One more note...I contacted our local Humane Society and proposed a business deal. If they will stock and sell my notecards I will donate 20% of the profits to the shelter. They indicated they were interested so I'll be meeting with them soon to show them the cards and work out the details. I see it as a possible win/win situation and I feel good about doing something more locally for the animals.

Thursday, October 01, 2009

Cats is Crazy


I haven't posted in awhile because I'm still working on the next version of Berries & Birch. The background effect I'm going for is tedious to paint and I'm lacking in patience so I do a little...stop...do a little more...stop and so on. I hope to have an update soon. Meanwhile I thought my visitors might get a chuckle out of these cat photos. A friend of mine from school sent them to me and I chose my favs to share.


Saturday, September 26, 2009

Exploring Options

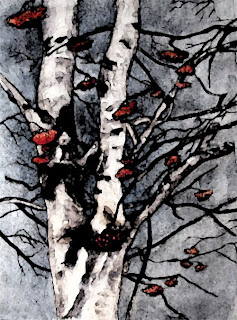
Now this is what I'm talking about! This is definitely an option worth considering. I hit this one with the watercolor filter and got some real impact going on. It makes the original painting look downright drab. Anyone up for watercolor and wet charcoal?
IMO, this is a job for colored pencils. Not sure which filter I used for this effect but if anyone is interested I can sure go back and find out.

Last night I opened Elements and experimented with my latest painting. I got some interesting and extremely varied results. To tell the truth, the first time I considered painting the birch reference I thought of Nick Simmon's koi technique. His 'sewing machine stitch'(one of many unique techniques he demos on his DVD) and the use of spattering with a toothbrush to add shading and volume came to mind immediately. I will need to think on a much larger scale but I may try it out on a closeup section to see if I can pull it off. I'll need to order some full sheets of HP as well. It sure won't be Arches HP, though. I really should contact that company and let them know the problems I've had...at least with this latest block.

Friday, September 25, 2009

Berries & Birch~Version #1 Completed


SOLD

I spent far more time than I intended on this but one thing lead to another and I got caught up in painting berries, adding twiggy little branches and general overall tweaking. Oddly, the berries turned out to be the biggest challenge. I mixed a combo of pyrrol red and perm. yellow for the orange. Pyrrol red, if you haven't tried it yet, is a potent color and it completely overtook the perm. yellow on the gesso. I waited until the first application of paint was dry, then gently lifted out the berries with a damp brush. The perm. yellow held onto the gesso and the pyrrol red stained just enough to create the shade of orange I was shooting for. I used some of the color mixture from the trunks to add shading and depth to the berry clusters. I created the twigs with the pointed tip of a bamboo skewer soaked in water, then dipped in undiluted tube paint.


Btw, the mystery tree with the berry clusters is a form of Mountain ash.

Wednesday, September 23, 2009

Berries & Birch~WIP Update


The color in this photo is obviously not accurate but I wanted to show that I've begun the detail work on the trunk and started adding the smaller branches. I had to reapply the masking to the berries with my masking pen. I'm saving them for last. So far my palette has consisted primarily of FUB(red shade), burnt sienna, cobalt blue deep and Payne's grey. I know...it's at the ugly stage.


The background is complete and the masking has been removed. I chose a mixture of Payne's grey and cobalt blue and applied the color by pouring. Cobalt blue is a nice color but it's weak in value so I sprayed on a little Indigo/FUB around the trunk with an atomizer bottle for more contrast. The resulting effect reminded me of stonewashed denim.

The gesso is finally dry and I've applied my masking fluid.


A closeup of the gessoed surface. I chose to try cross-hatching with a 2" brush for the texture element.


I knew when I began painting this it wouldn't be the final. It really should be in a much larger format to look effective but I decided to experiment with different techniques, surfaces and palettes before committing to the final piece so I'm working on my Arches HP block which is only 12" x 16". The comp had to change a little to fit the paper so I sacrificed part of the lower trunk. It's times like these I wish I had a projector. Maybe that'll be next on my wish list.


This particular block of Arches HP doesn't want to release masking fluid well so I coated my paper beforehand with gesso. I also wanted to see how the gesso could add to the piece.

Sunday, September 20, 2009

Berries & Birch~WIP

This is the sketch after alteration in Elements 6.0. I selected the shade of red I desired and used the Eyedropper set at size 13 to literally drop in the berries. Next I switched to Brush and added the black and greys. I set the Brush size at 9 & 2 respectively. When I felt I had added enough 'information' I softened some of the dropper and brush work with the Blur feature. Tada!
The initial sketch

Last December I took a photo of the birch tree that grows across the drive from my home titled Berries & Birch. Nearby another tree grows that produces clusters of vivid orange-red berries that stay on the tree all winter, well after the foliage has fallen. I really should know the name of this berry producing tree/shrub(?) being a gardener but trees and shrubs were never my forte. I'll be researching this one and I will find out what it is. What drew my interest was the way the branches of each tree crisscrossed each other and the contrast of the bright red berries against the greys, whites and the bits of black on the birch. The blue-grey winter sky added the perfect background.


Last night I drew a quick sketch from the photo, indicating the placement of the berry clusters using several amorphous shapes scribbled here and there. This morning I refined the sketch somewhat and studied it to see how well the composition worked. I realized without the color of those berries it would be hard to tell what the final result might be. I didn't want to add color to my sketch so I did the next best thing. I put it in Elements.

Tuesday, September 15, 2009

Fern Canyon~First Landscape


Landscapes...a subject I've managed to avoid for my entire painting 'career' until this past week. I've had this niggling little urge to try my hand at one since I attempted to paint my trillium landscape, which btw is still waiting in the wings. I finally decided to have a go at Fern Canyon because I was so taken with it's beauty. I took elements I liked from both photos (previously posted) and tried to incorporate them into one painting. My goal was to convey the feeling of entering into another world within a world. One that is lush and green and cool. Isn't that what landscape painters do? Try to take the viewer there, wherever 'there' may be and hopefully allow them to experience what the artist experienced?

Friday, September 11, 2009

Searching for Inspiration


Fern Canyon in Northern California.


It's like walking into another world.

The Fern Canyon photos have rekindled my desire to try a landscape. I remember how I felt walking into that canyon even after all these years. So lush and green, I felt cradled and safe there for some reason.


I'm absolutely dwarfed by this giant! It just keeps going up & up.


Me & a tree


The Redwoods


Morro Bay


Trolley scene in SF


Today I got out some old snapshots of my trip along the California coastline from San Diego to Klamath in hopes of getting my creative juices flowing again. These photos sure brought back great memories. San Fran. was the most amazing city I've ever visited and I now know where all the old hippies went after the 70's...to Mill Valley. Jeff Beck's instrumental, 'Girl From Mill Valley' is still one of my favorite pieces of music. The Redwoods simply blew me away. So ancient yet still stately and proud. Walking among them I felt as though I had entered Nature's cathedral. The banana slugs that dwell below these incredible trees made me realize that Nature has a sense of humor, too.

Sunday, August 30, 2009

Working Out The Poppy


I put the image of the poppy that I 'twirled' back into Elements and cropped it into a square format. Then I used the Ink Outlined filter set at 17-Stroke Length, 25-Dark Intensity and 37-Light Intensity and got some very interesting results which I chose to save for reference. It was still missing something so using the brush stroke feature I dropped turquoise into some of the deeper midtones to bring in a contrasting color. Looking at the image on screen, I think the turquoise needs to be brighter as it's not showing up well enough. (Btw, forgive my crude brush technique. I'm not terribly steady with my computer mouse.) It's becoming more abstract with every change. The trick for me will be to bring this to fruition with brush on paper.